Customizing the Appearance
activeCollab allows you to customize your working environment to suit your needs. Here are a few tips on how to do that quickly and easily:
Upload Your Company Logo in activeCollab #
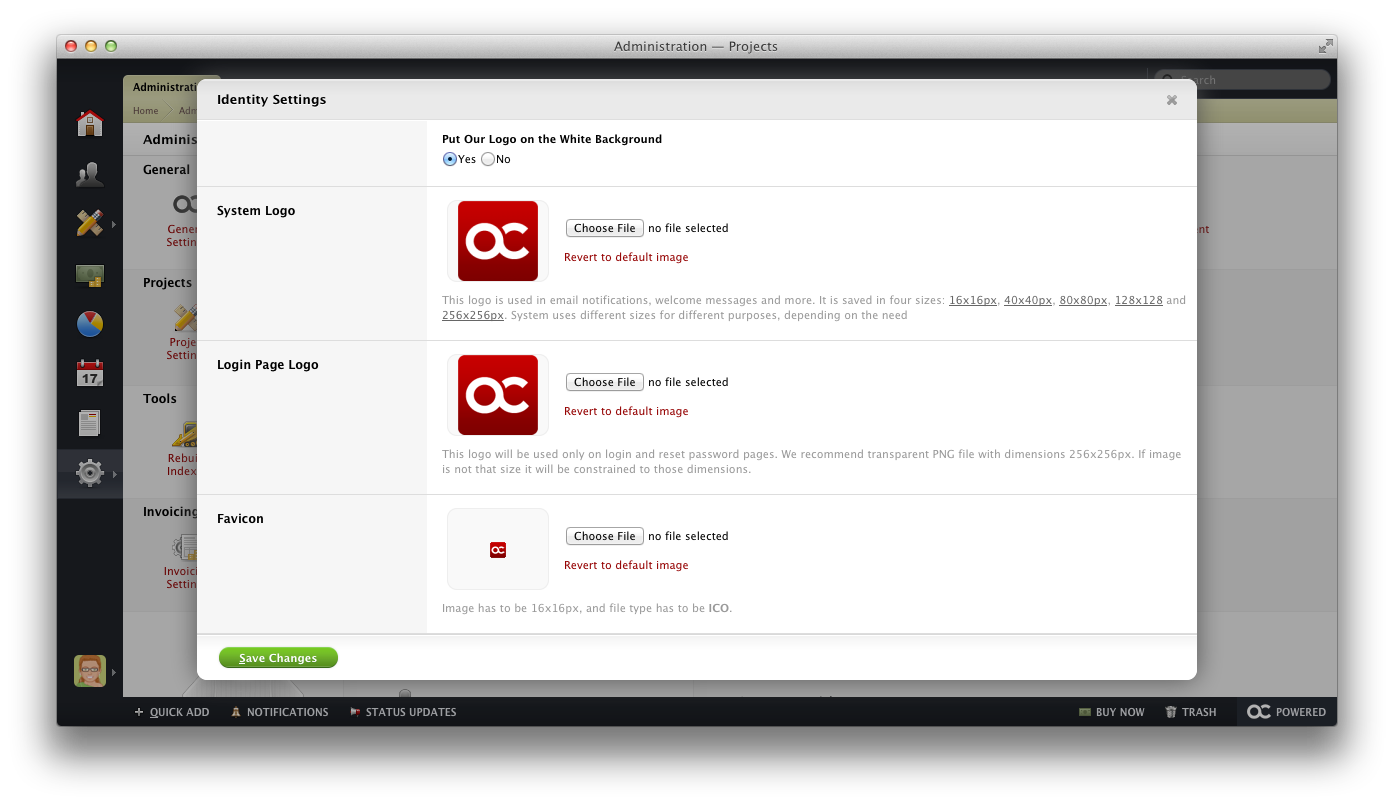
Use your company logo to replace the default activeCollab logo throughout the application. Your company logo can be placed as:
- System Logo displayed in all emails sent out by the system - Notifications, Welcome Messages, Invoices, etc.
- Login Page Logo visible to all users logging in to activeCollab.
- Favicon located on the tab in your browser.
To upload the logo, go to Administration > Identity Settings and select the image file to upload:

Change the Color Scheme #
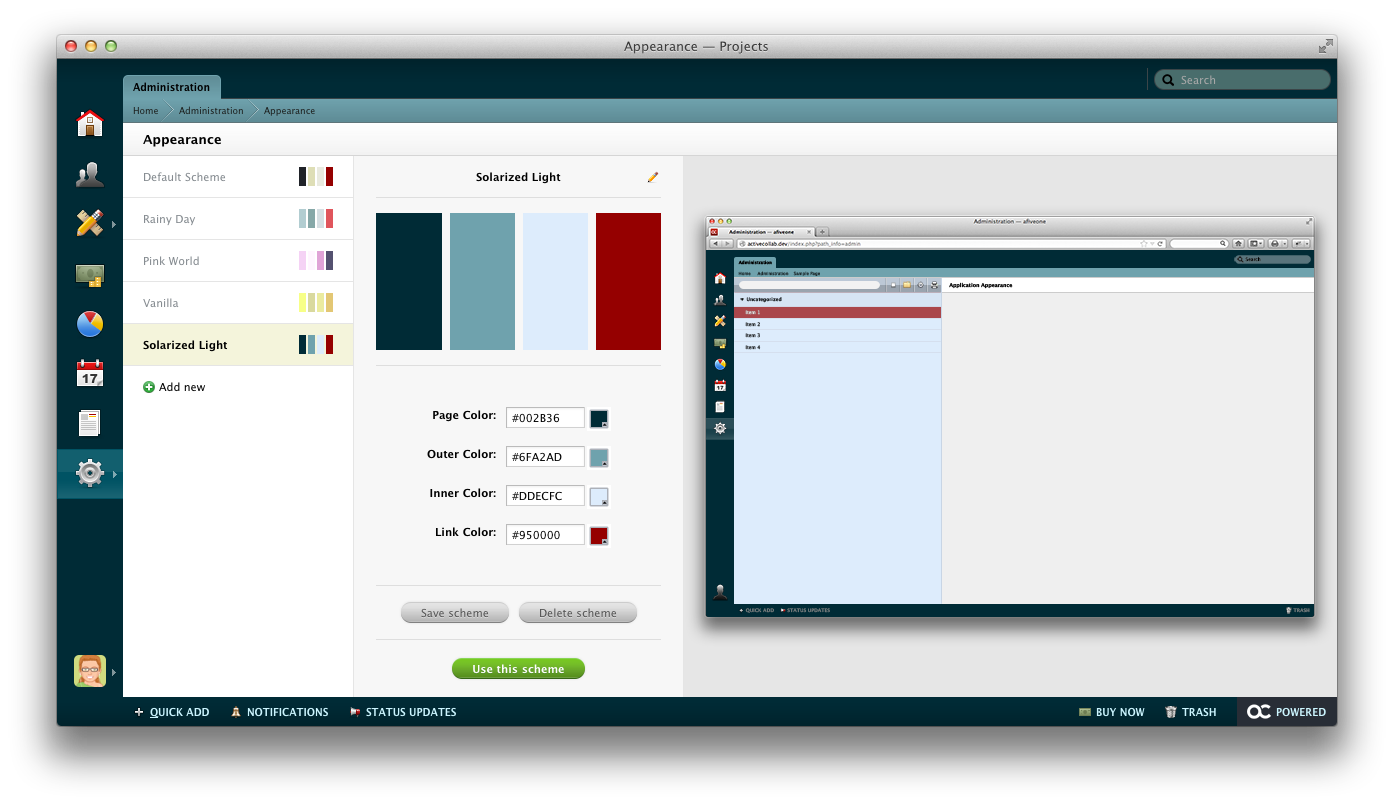
To change the user interface color scheme, use the Appearance tool:
Visit the Administration > Appearance page.
Click the Add New button.
Set the colors that you wish to use.
Click the Use this Color Scheme button.

Welcome Messages #
There are two convenient ways to welcome new members to your Project collaboration hub:
1. Personalized Welcome Email
When you are inviting a New User to your activeCollab you have the option to add a Personalized Message to the invitation email. By doing so, the person will receive the login credentials followed by your welcome message.
If you have already uploaded your company logo, the Welcome Email sent to new users will display the logo in the message body.
2. Home Screen Announcements
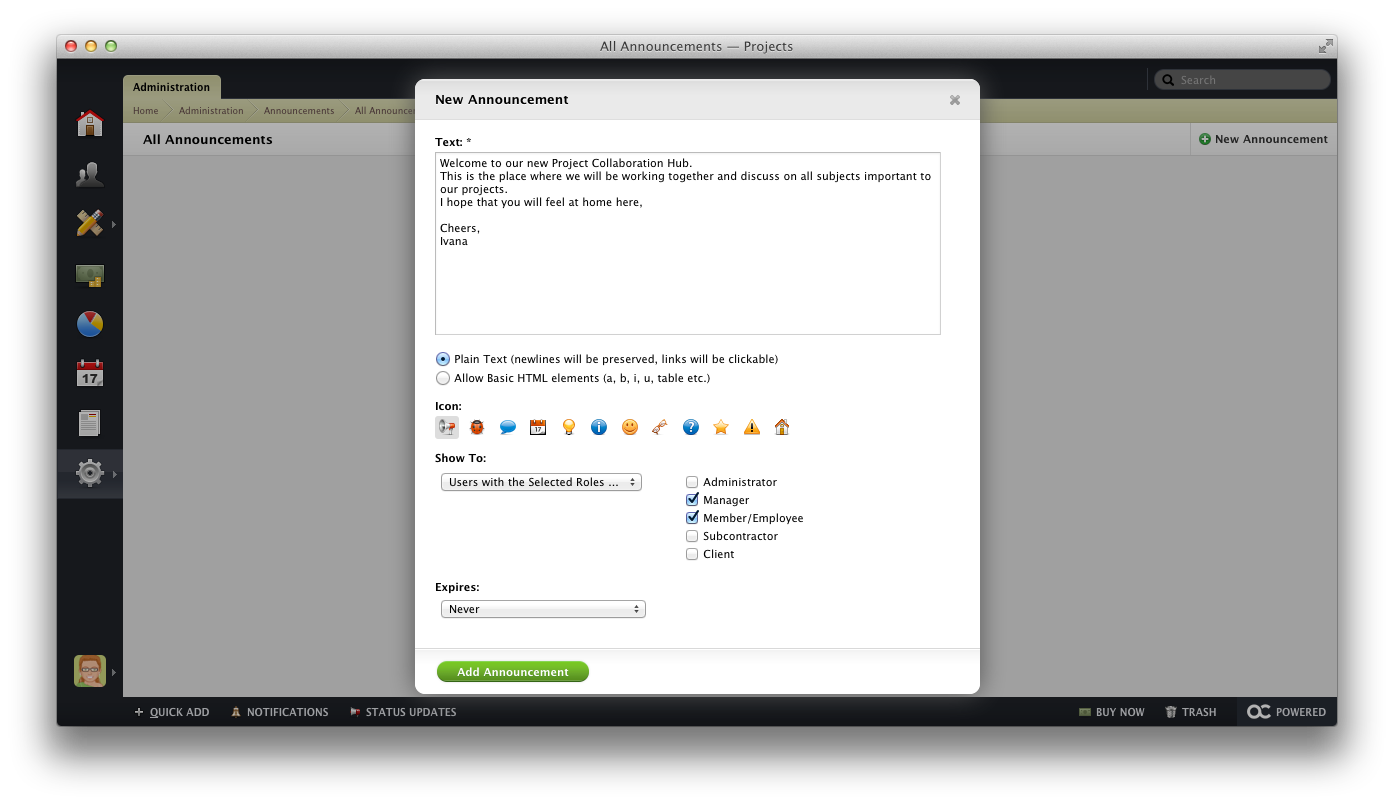
Use the Announcements tool available in the Administration to post a message on the Home Screen.
Write the message and select the group of users, who will see it on their Home Screen (and, optionally, receive an email notification). After everything is set, just click the Add Announcement button to post the notification:

Customize Your Invoices #
activeCollab can be used to create and issue professional looking Invoices. The outlook of Invoices is fully customizable. To learn how to edit the appearance of Invoices, please read Customizing Invoices.
