Defining a New Report
Now that we have defined our new Module and made a new Home Screen widget, we can learn how to add a new section into the existing one in activeCollab.
We will first add our report into the Reports & Filters section. This report will list all active projects on which the current user is working on. It will also display the amount of time and expenses tracked for these projects.
To accomplish that, we will need to:
- Create a report page that displays the desired data.
- Connect that page with the Reports & Filters section.
Routes, Controllers and Views #
If you wish to add a new page to activeCollab, you will need to use the following elements:
- Routes which will define the URL that maps with a particular controller and action (which eventually render a page). Route definitions can be simple, with a specified path, or complex, with variables. They define how particular URL maps with an appropriate controller and controller action.
- Controller is an object that contains an action that will handle the requested page.
- Action is a function within a controller that is used for handling the requested page.
- View is a Smarty template used for displaying data in HTML format.
First, define a route by putting the following line in defineRoutes method of your module class somewhere in our module definition class (in MyReportsModule.class.php):
1
2
3
function defineRoutes() {
  Router::map('my_projects_report', 'reports/my-projects', array('controller' => 'my_reports', 'action' => 'index'));
}
We have just created a new route with the name my_projects_report which will appear under wwww.myactivecollab.com/reports/my-projects. When that URL is visited, the controller my_reports will be raised and the system will call its index action form. In order to handle that, we need to create a MyReportsController.class.php with index action. We will place the controller file in /path/to/activecollab/custom/modules/my_reports/controllers folder and the controller will be defined as:
1
2
3
4
5
6
7
8
9
10
11
12
13
14
15
16
17
18
19
<?php

  // Build on top of reports module
  AngieApplication::useController('reports', REPORTS_FRAMEWORK_INJECT_INTO);

  /**
   * My reports controller implementation
   */
  class MyReportsController extends ReportsController{

    /**
     * Index action
     */
    function index() {
      $this->response->assign(array(
        'projects' => Projects::findActiveByUser($this->logged_user)
      ));
    }
  }
With this code, we have instructed the projects model to send the list of all active projects for a logged in user and assigned the result to the view. Now it is up to the view to display the data that we have loaded.
All views are defined in the /views subfolder of a module, grouped by the interface (web interface is the default interface). activeCollab is smart enough to automatically map the index action of my_reports controller with index.tpl view in /views/default/my_reports folder.
Here's an example of the index.tpl file:
1
2
3
4
5
6
7
8
9
10
11
12
13
14
15
16
17
18
19
20
21
22
23
24
25
{title}My Projects{/title}
{add_bread_crumb}My Projects{/add_bread_crumb}

{if $projects}
<table class="common" cellspacing="0">
  <thead>
  <tr>
    <th>{lang}Project{/lang}</th>
    <th>{lang}Leader{/lang}</th>
    <th>{lang}Cost so Far{/lang}</th>
  </tr>
  </thead>
  <tbody>
    {foreach $projects as $project}
    <tr>
      <td>{project_link project=$project}</td>
      <td>{user_link user=$project->getLeader()}</td>
      <td>{$project->getCostSoFar($logged_user)|money:$project->getCurrency()}</td>
    </tr>
    {/foreach}
  </tbody>
</table>
  {else}
<p class="empty_page">{lang}No projects loaded{/lang}</p>
{/if}
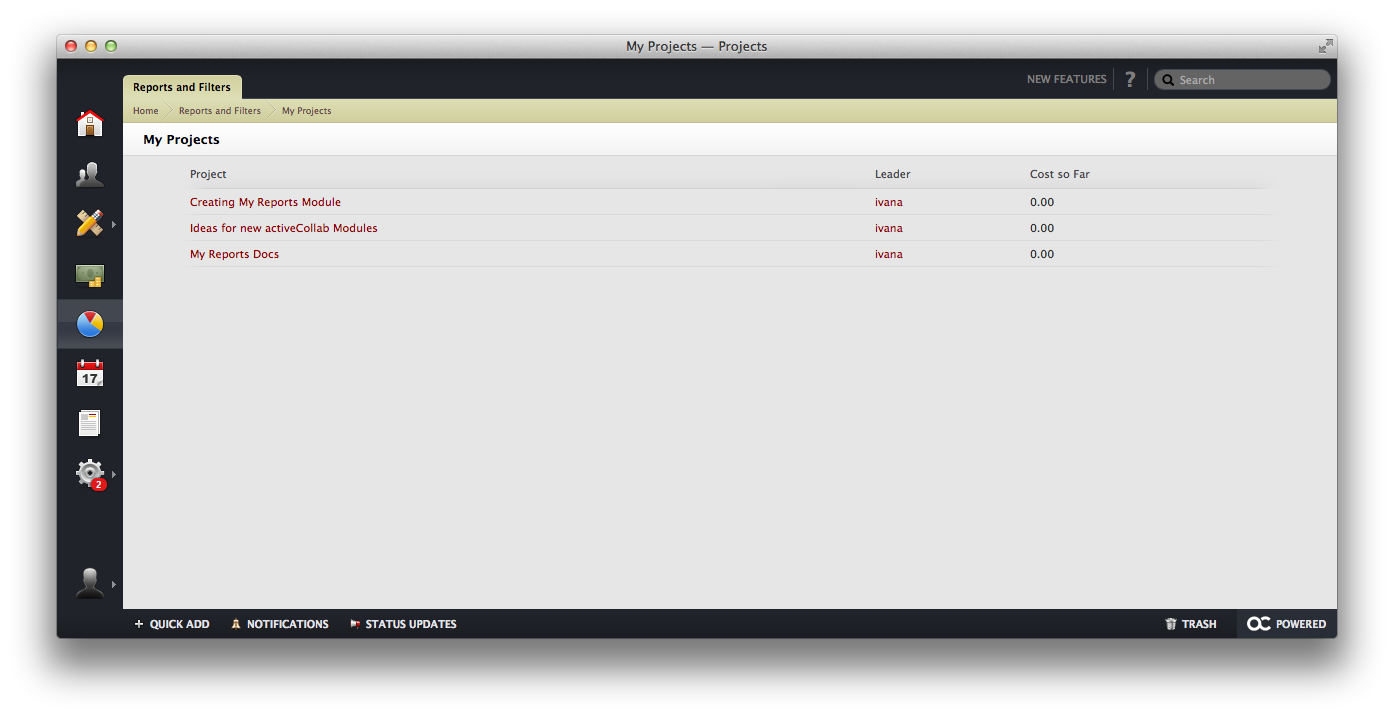
The template that we will use to display all active projects looks like this:

Registering a New Report #
Now that we have built a report page, we need to link it up into the Reports & Filters section. In order to do that, make sure that the module is listening to an event thrown by activeCollab when it collects the list of available reports and filters.
Do this by adding the following function to our MyReportsModule.class.php file:
1
2
3
4
function defineHandlers() {
  EventsManager::listen('on_homescreen_widget_types', 'on_homescreen_widget_types');
  EventsManager::listen('on_reports_panel', 'on_reports_panel');
}
The handler for this event will be defined in the on_reports_panel.php file. We will place this file in the handlers subfolder of our module. Here is the code that we will place in this file:
1
2
3
4
5
6
7
8
9
10
11
12
13
14
15
16
17
18
19
<?php

  /**
   * on_reports_panel event handler
   */

  /**
   * Handle on_reports_panel event
   *
   * @param ReportsPanel $panel
   * @param IUser $user
   */
  function my_reports_handle_on_reports_panel(ReportsPanel &$panel, IUser &$user) {
    if($user->isProjectManager()) {
        $panel->defineRow('my_reports', new ReportsPanelRow(lang('My Reports')));

        $panel->addTo('my_reports', 'my_projects_report', lang('My Projects'), Router::assemble('my_projects_report'), AngieApplication::getImageUrl('module.png', MY_REPORTS_MODULE , AngieApplication::INTERFACE_DEFAULT));
    } // if
  }
The lines used in the above example have the following meaning:
- $panel->defineRow(…) - We have created a new row panel in the Reports & Filters section with this code. The first parameter is the short name of the section (ID) and the second parameter is the section's label.
- $panel->addTo(…) - With this code we have added a widget to my_reports row and named it my_projects. The caption for this particular report is "My Project" and we will use the module.png that we already have in our module folder. Finally, AngieApplication::getImageUrl(…) will generate a full URL.
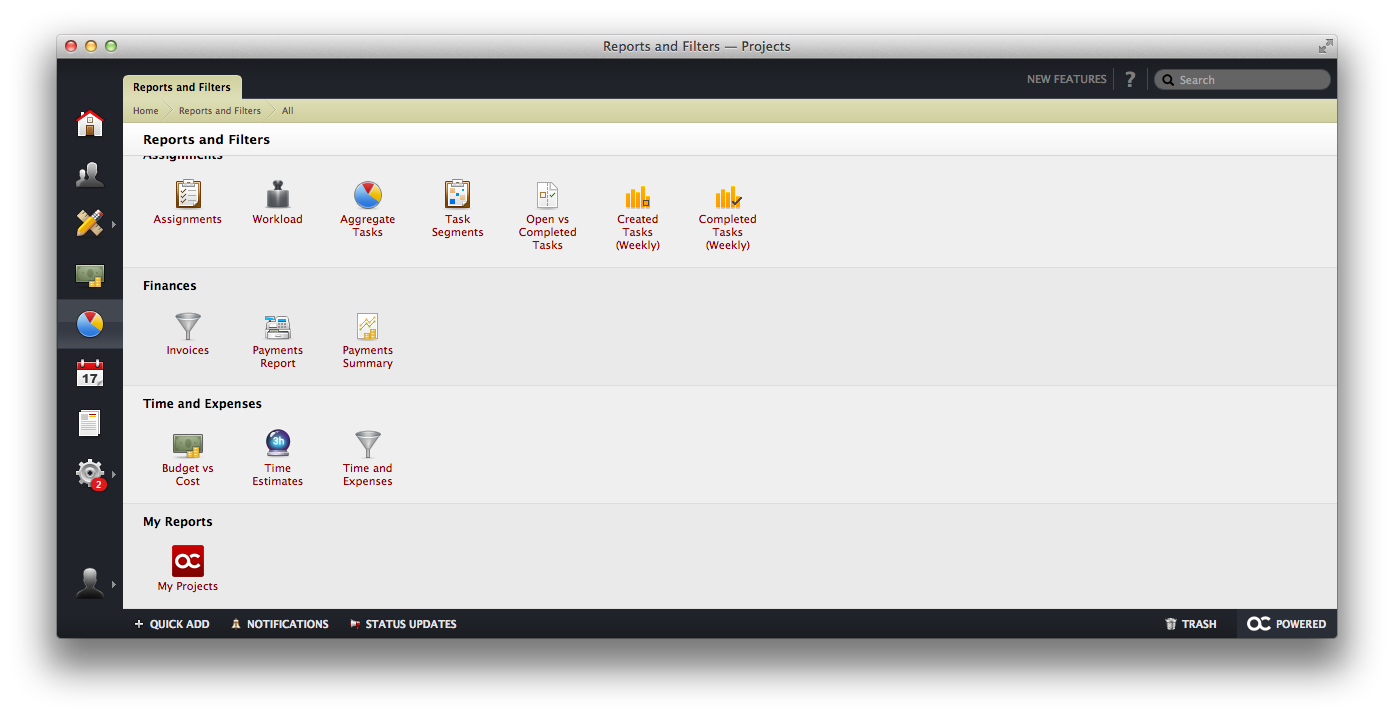
When this event handler is properly defined, and we go to the Reports & Filters page, we will see our report as one of the available options:

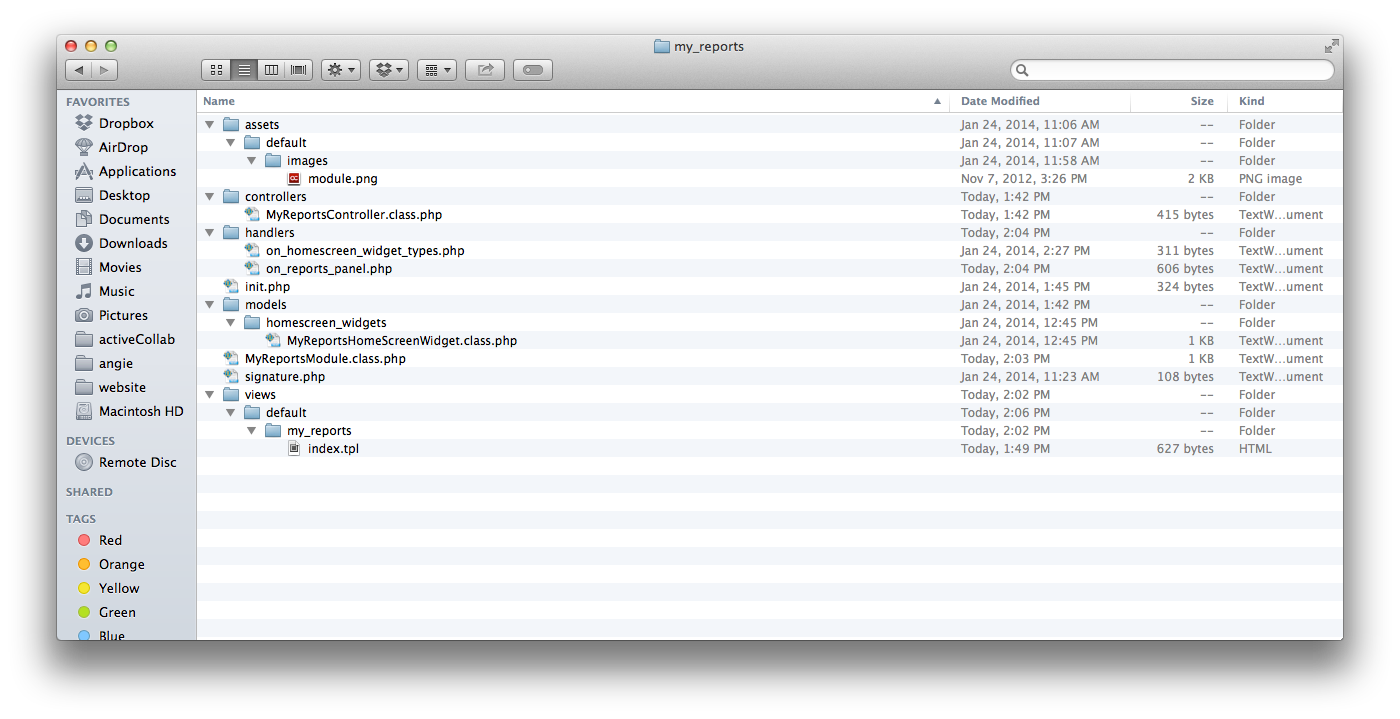
At the end of this tutorial, your my_reports module structure should look like this:

